27 Jul 2011
While ago I found this amazing tool that optimizes PNG images and reduces the size effectively. I use Adobe Fireworks to create lots of PNG images for my work and using this tool makes them much smaller in size.
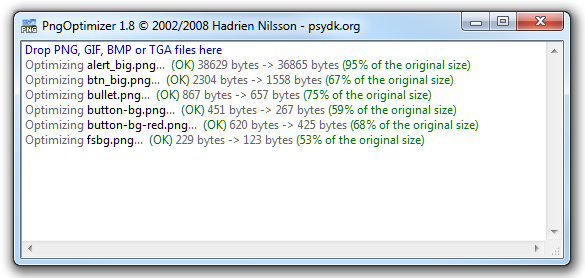
PngOptimizer is free and using it is very simple. Just drag-n-drop your files over the application and they get optimized!
06 Dec 2010
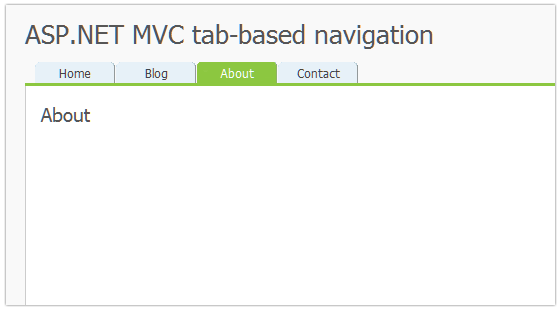
First of all this is not one of those JavaScript tab navigation scripts. Actually we are going to use no JavaScript.
Each tab is going to be linked to an ASP.NET MVC controller action. This is how end result is going to look like:
Source code for this article can be accessed from github.com/atashbahar/mvc-tab-nav.
So how exactly this works?
We have a HTML helper method named SimpleNav that renders the HTML to the master page. This is how it is called:
<div id="menubar">
    <%= Html.SimpleNav(new[] {
        new SimpleNavItem{Text="Home", Action="Index", Controller = "Home"},
        new SimpleNavItem{Text="Blog", Action="Index", Controller = "Blog", GetSelected = ((a, c) => (c == "Blog"))},
        new SimpleNavItem{Text="About", Action="About", Controller = "Home", GetSelected = ((a, c) => c == "Home" && a == "About")},
        new SimpleNavItem{Text="Contact", Action="Contact", Controller = "Home", GetSelected = ((a, c) => c == "Home" && a == "Contact")}
    }) %>
</div>
The code for this helper method is very straightforward. It simply generates an unordered list of links:
public static string SimpleNav(this HtmlHelper html, IEnumerable<SimpleNavItem> navItems)
{
    var urlHelper = new UrlHelper(html.ViewContext.RequestContext);
    string controller = html.ViewContext.RouteData.Values["controller"].ToString();
    string action = html.ViewContext.RouteData.Values["action"].ToString();

    TagBuilder ul = new TagBuilder("ul");
    ul.AddCssClass("clearfix");

    StringBuilder listBuilder = new StringBuilder();
    TagBuilder li = null;
    TagBuilder a = null;
    foreach (var item in navItems)
    {
        a = new TagBuilder("a");
        a.Attributes.Add("href", urlHelper.Action(item.Action, item.Controller));
        a.InnerHtml = item.Text;

        li = new TagBuilder("li");
        if (item.GetSelected != null && item.GetSelected(action, controller))
            li.AddCssClass("sel");
        li.InnerHtml = a.ToString();

        listBuilder.Append(li.ToString());
    }

    ul.InnerHtml = listBuilder.ToString();

    return ul.ToString();
}
public class SimpleNavItem
{
    public string Text { get; set; }
    public string Action { get; set; }
    public string Controller { get; set; }
    public Func<string, string, bool> GetSelected { get; set; }
}
The interesting part of the above code may be GetSelected which is an anonymous method. You might want a tab gets highlighted on certain conditions for example highlight the Blog tab for all Actions of the related Controller. The method accepts two Strings which are name of the current Controller and Action and returns a Boolean which indicated if the tab should be highlighted or not.
The final step which I like the most is to make it pretty. By using a simple background image and a small amount of CSS magic you can easily achieve this:
#menubar {
    border-bottom: solid 3px #8CC740;
    padding-left: 10px;
}
#menubar li {
    display: inline;
}
#menubar li a {
    float: left;
    line-height: 21px;
    width: 80px;
    margin-right: 1px;
    background: url(tabs.gif) no-repeat 0px 0px;
    color: #444;
    text-align: center;
    text-decoration: none;
}
#menubar li a:hover {
    background-position: 0px -22px;
    text-decoration: none;
}
#menubar li.sel a {
    background-position: 0px bottom;
    color: #fff;
}
This may not be the most complete solution but it has helped me in so many projects. Hopefully it does the same for you.
27 Apr 2010
A while ago in one of my projects I came into this problem that I wanted to detect when a child window that is created with window.open method gets closed.
As you know it is possible to call a JavaScript function in parent page from a popup window using parent.[JavaScript-Method-Name]. But this didn't work for me because the page I was opening was from another domain and couldn't modify its content.
Unfortunately the popup window does not have any close event that you can listen to but there is a closed property that is true when window gets closed. So the solution I came up with was to start a timer and check the closed property of the child window every second and clear the timer when the window gets closed. Here is the code:
var win = window.open('http://www.google.com', 'google','width=800,height=600,status=0,toolbar=0');
var timer = setInterval(function() {
    if(win.closed) {
        clearInterval(timer);
        alert('closed');
    }
}, 1000);
Hope this helps.
30 Apr 2009
I thought I share this with you because I spent some time before finding the solution. What I wanted to do is to simply convert a multipage TIFF image to a PDF file. I wanted this for an ASP.NET project.
TallPDF does this but you have to pay a lot for a simple task (TallPDF does other things too though!). After some searching came to the conclusion that PDF Creation Libraries are my best option here. There are a few for .NET including iTextSharp, PDFsharp and PDF Clown. I used iTextSharp because it has a sample that was showing how to create a PDF file from a multipage TIFF image (exactly what I wanted).
Here is the code that does the conversion:
// creation of the document with a certain size and certain margins
iTextSharp.text.Document document = new iTextSharp.text.Document(iTextSharp.text.PageSize.A4, 0, 0, 0, 0);

// creation of the different writers
iTextSharp.text.pdf.PdfWriter writer = iTextSharp.text.pdf.PdfWriter.GetInstance(document, new System.IO.FileStream(Server.MapPath("~/App_Data/result.pdf"), System.IO.FileMode.Create));

// load the tiff image and count the total pages
System.Drawing.Bitmap bm = new System.Drawing.Bitmap(Server.MapPath("~/App_Data/source.tif"));
int total = bm.GetFrameCount(System.Drawing.Imaging.FrameDimension.Page);

document.Open();
iTextSharp.text.pdf.PdfContentByte cb = writer.DirectContent;
for (int k = 0; k < total; ++k)
{
	bm.SelectActiveFrame(System.Drawing.Imaging.FrameDimension.Page, k);
	iTextSharp.text.Image img = iTextSharp.text.Image.GetInstance(bm, System.Drawing.Imaging.ImageFormat.Bmp);
	// scale the image to fit in the page
	img.ScalePercent(72f / img.DpiX * 100);
	img.SetAbsolutePosition(0, 0);
	cb.AddImage(img);
	document.NewPage();
}
document.Close();
As you can see it is very simple and straightforward.
14 Feb 2009
You have all seen "Download All" feature of popular email providers like Yahoo! And Gmail that allows you to download multiple attachments as a single zip file.
Recently we needed something like that in one of our projects. We wanted to download contents of a folder as a zip file. It was very important to stream the compressed result to the client as we were compressing them on the server.
You may say that you could have zipped the folder on server so users could download it directly, but that was not an option in our case because contents of the folder were changing always.
When comes to compression for .NET, SharpZipLib is one of the best options you got. At start I thought solving this problem is not going to be very easy but I was in luck because SharpZipLib has a special class name FastZip that was exactly what I was looking for. FastZip class has a CreateZip method that has few overloads. One of the overloads gets an output stream and a path to a folder on disk; what it does is to send the compressed contents of the folder to output stream. This was exactly what I was looking for so I created static DownloadFolder method in my Utility class that accepts two parameters; first one is the path to the folder that we want to zip and second parameter is of type HttpResponse. We use HttpResponse OutputStream to send the zipped content to user. Here is the code for this method:
using System;
using System.Web;

public static class Utility
{
    public static void DownloadFolder(string path, HttpResponse res)
    {
        // cleat the response so we don't send any unwanted data to user
        res.Clear();
        // set the content type ZIP file
        res.ContentType = "application/zip";
        // setting Content-Disposition to attachement causes the save dialog of the
        // browser to be shown. We also can set the name of the zip file in this header
        res.AppendHeader("Content-Disposition", "attachment; filename=Download.zip;");
        // it is very important to set BufferOutput to false. Default behavior is to buffer
        // the output before sending it to client and this is not the behavior we want
        res.BufferOutput = false;
        // flush the response so user will get the save dialog as soon as possible
        res.Flush();

        // FastZip is the easies way to zip all the file and folders in the
        // path and stream it through the Response OutputStream
        ICSharpCode.SharpZipLib.Zip.FastZip fz = new ICSharpCode.SharpZipLib.Zip.FastZip();
        fz.CreateZip(res.OutputStream, path, true, null, null);
    }
}
Using this method is very easy. You have two options one is to create an Http Handler; Users download the zipped content by access its address (for example by clicking a link that points to it).
using System;
using System.Web;

public class DownloadAll : IHttpHandler {

    public void ProcessRequest (HttpContext context)
    {
        Utility.DownloadFolder(context.Server.MapPath("~/App_Data/Storage"), context.Response);
    }

    public bool IsReusable {
        get {
            return true;
        }
    }
}
Second method is to use it inside your ASPX page, for example when you click a button on your page. Here's how it is done:
<%@ Page Language="C#" %>

<!DOCTYPE html PUBLIC "-//W3C//DTD XHTML 1.0 Transitional//EN" "http://www.w3.org/TR/xhtml1/DTD/xhtml1-transitional.dtd">

<script runat="server">

    protected void Page_Load(object sender, EventArgs e)
    { }

    protected void btnDownload_Click(object sender, EventArgs e)
    {
        Utility.DownloadFolder(Server.MapPath("~/App_Data/Storage"), Response);
    }
</script>

<html xmlns="http://www.w3.org/1999/xhtml">
<head runat="server">
    <title>Download All</title>
</head>
<body>
    <form id="form1" runat="server">
    <div>
        <asp:Button ID="btnDownload" runat="server" Text="Download All" onclick="btnDownload_Click" />
        <br />
        <a href="DownloadAll.ashx">Download All</a>
    </div>
    </form>
</body>
</html>
Well, that's it for now! As you can see it was very easy to do something that looked a little hard at start all thanks to SharpZipLib library.